What is Gitea? #
Gitea is a free and open source Git repository management system that can be easily installed and run in a Docker container. It provides a convenient web application interface for managing your Git repositories and various aspects of their development, and can be used both locally and in cloud mode.
To install Gitea in Docker on your server, Docker and docker-compose must be installed.
Creating configuration files #
To create configuration files, create a folder where the docker-compose.yml configuration file and other files related to Gitea will be stored. Create the docker-compose.yml file using a text editor and paste the following code:
`version: "3"

services:
  server:
    image: gitea/gitea:latest
    container_name: gitea
    restart: always
    environment:
      - USER_UID=1000
      - USER_GID=1000
    volumes:
      - ./data:/data
      - ./custom:/app/gitea/custom
      - ./log:/app/gitea/log
    ports:
      - "3000:3000"
      - "2222:22"
Here:
image: gitea/gitea:latestspecifies that you want to use the latest version of Gitea available on Docker Hub.container_name: giteasets the Docker container name.restart: alwaysautomatically restarts the container when it stops.environment: - USER_UID=1000 - USER_GID=1000sets the user ID and group used in the container.volumes: - ./data:/data - ./custom:/app/gitea/custom - ./log:/app/gitea/logdefines the location on the hard drive where Gitea data (./data), custom configuration files (./custom), and logs (./log) will be stored.ports: - "3000:3000" - "2222:22"specifies the ports to be used for accessing Gitea. The first port (3000) is used for the web interface, and the second port (2222) is used for accessing the repository via SSH.
Running the container with Gitea #
To run the container, go to the directory where the docker-compose.yml file is located and run the container using the command:
docker-compose up -d
This will start the Gitea container in the background. The first launch may take a few minutes.
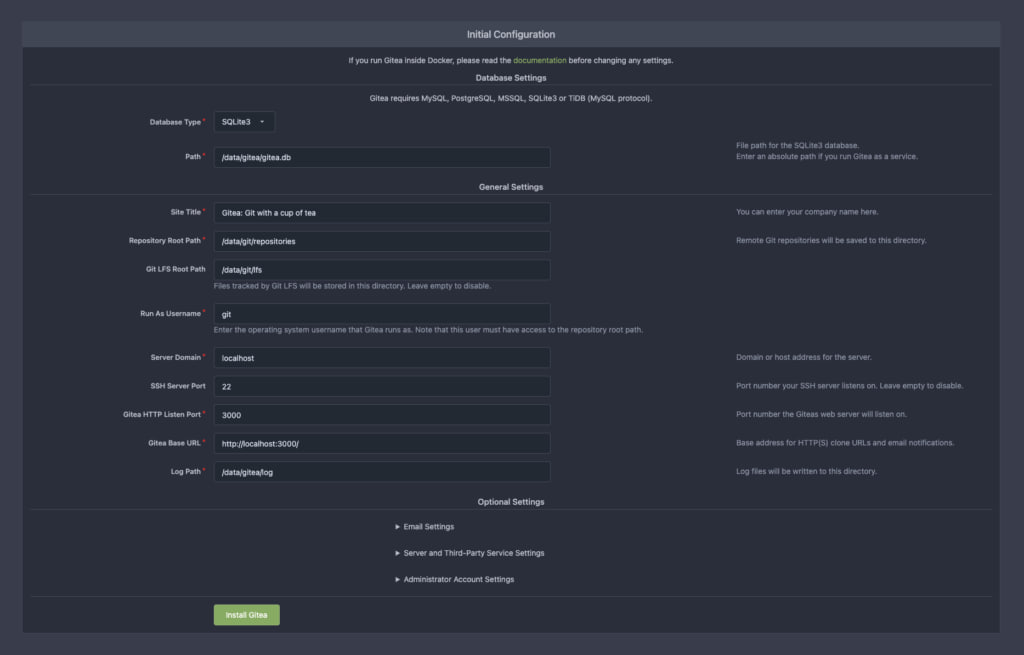 After starting, open a web browser and enter the address
http://server-ip:3000 to access the Gitea web interface. You should see the login page. Fill in all the necessary fields according to your configuration. In the “Server Domain” field, be sure to specify the IP address or domain name that points to your server.
After starting, open a web browser and enter the address
http://server-ip:3000 to access the Gitea web interface. You should see the login page. Fill in all the necessary fields according to your configuration. In the “Server Domain” field, be sure to specify the IP address or domain name that points to your server.